Scheduling YouTube videos is essential for efficient content management. This guide provides a step-by-step process for marketers to schedule their YouTube content effectively.
Quick Answer Summary
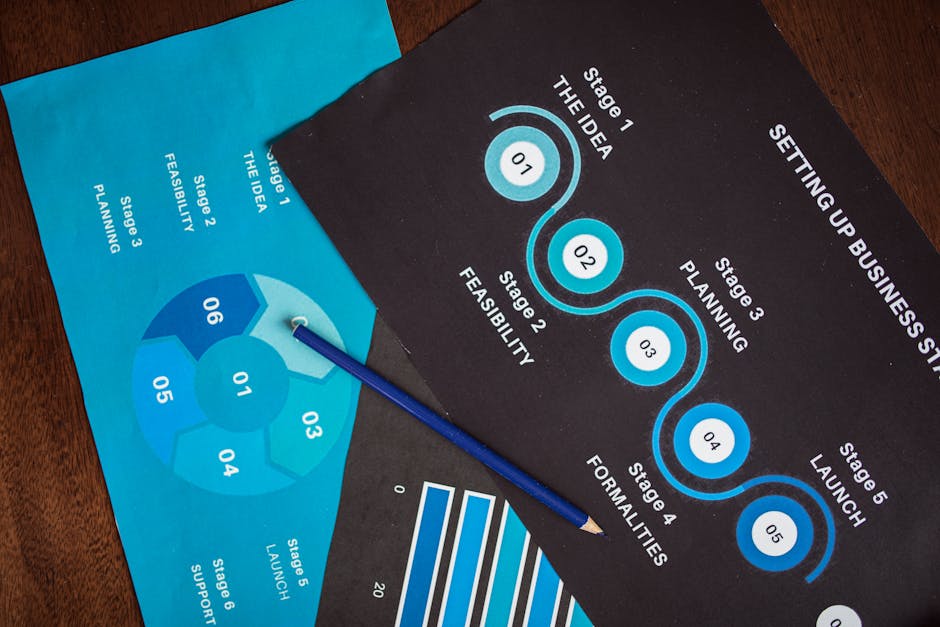
This comprehensive guide covers essential aspects of schedule youtube videos: a step-by-step guide, including practical steps, best practices, and expert insights.
Introduction: Why Schedule YouTube Videos?
In today's fast-paced digital landscape, consistency is key to building a successful YouTube channel. Scheduling your YouTube videos isn't just a convenience; it's a strategic move that can significantly impact your channel's growth and engagement. By planning and scheduling your content in advance, you gain valuable control over your publishing schedule and ensure a steady stream of content for your audience.
Key Benefits of Scheduling:
- Consistent Upload Schedule: Maintain a regular upload schedule to keep your audience engaged and coming back for more.
- Time Savings: Batch create and schedule content in advance, freeing up your time for other important tasks like content creation and community engagement.
- Optimal Timing: Schedule videos to publish when your audience is most active, maximizing views and engagement. Many analytics tools can help you identify these peak times.
- Strategic Campaign Planning: Coordinate YouTube content with other marketing initiatives for a cohesive and impactful brand message.
💡 Pro Tip: Use a content calendar to visually map out your video schedule and identify any gaps or opportunities for themed content weeks.
This guide will walk you through the step-by-step process of scheduling YouTube videos, empowering you to take control of your content strategy and optimize your channel for success. You'll learn how to use YouTube's built-in scheduling tools, as well as explore other scheduling platforms to streamline your workflow. We'll cover everything from uploading your video to setting the perfect publish time, ensuring your content reaches your audience when they're most receptive. Many social media management platforms, like PostLayer, offer integrated YouTube scheduling alongside other social media channels, simplifying your content management process.
By the end of this guide, you'll have the knowledge and tools to efficiently schedule your YouTube content, allowing you to focus on creating high-quality videos and building a thriving community.
Step 1: Prepare Your Video for Upload
Before you even think about scheduling your YouTube video, it's crucial to ensure it's fully optimized for visibility and engagement. This preparation stage is arguably the most important, as it sets the foundation for your video's performance. Think of it as laying the groundwork for success. Proper optimization increases the likelihood of your video being discovered and watched by your target audience.
Key Considerations:
- Video Optimization Basics: Ensure your video resolution is high (ideally 1080p or higher) and that your audio is clear. Poor quality can deter viewers.
- Crafting an Engaging Title: Your title should be concise, keyword-rich, and intriguing enough to pique viewers' interest. Consider incorporating relevant keywords that your target audience might search for.
- Writing a Compelling Description: Use the description to provide context, highlight key takeaways, and include relevant links (e.g., to your website, social media profiles, or related videos). The first few lines are especially important, as they're often displayed in search results.
- Selecting Relevant Tags: Tags help YouTube understand what your video is about and who it should be shown to. Use a mix of broad and specific keywords that accurately reflect your video's content.
- Designing a Click-Worthy Thumbnail: Your thumbnail is often the first thing viewers see. Create a custom thumbnail that is visually appealing, clear, and representative of your video's content. Avoid using automatically generated thumbnails, which are often low-quality.
- Adding End Screens and Cards: Use end screens and cards to promote other videos, playlists, or your channel, and to encourage viewers to subscribe. These features can help keep viewers engaged and on your channel longer.
💡 Pro Tip: Research popular keywords related to your video's topic using tools like Google Keyword Planner or YouTube's search suggestions. Incorporate these keywords naturally into your title, description, and tags to improve your video's search ranking.
By thoroughly preparing your video with these optimization techniques, you significantly increase its chances of success on YouTube. This upfront effort will make the scheduling process much more effective, allowing you to reach a wider audience and achieve your content goals.
Step 2: Uploading Your Video to YouTube
Once you have your video edited, optimized, and ready to go, the next step is uploading it to YouTube. This process is straightforward, but understanding the nuances can significantly impact your video's visibility and performance. The primary hub for uploading and managing your YouTube content is YouTube Studio. To access it, simply navigate to YouTube and click on your profile icon in the top right corner. From the dropdown menu, select "YouTube Studio."
Key Considerations:
- Ensure your video file is in a supported format. YouTube accepts a wide range of formats, including MP4, MOV, and AVI. MP4 is generally recommended for its compatibility and compression efficiency.
- Pay attention to your video's file size. While YouTube supports large files, smaller file sizes will upload faster. Optimize your video's compression settings before uploading.
- Double-check your audio levels. Inconsistent audio can be distracting for viewers. Aim for consistent and clear audio throughout your video.
Within YouTube Studio, you'll find an "Upload" button, often represented by a camera icon with a plus sign. Clicking this button will prompt you to select the video file from your computer. As your video uploads, you'll be presented with various options to customize your video's details. These include adding a title, description, tags, and selecting a thumbnail. These elements are crucial for discoverability, so take the time to optimize them effectively. A compelling title and description, coupled with relevant tags, can significantly improve your video's search ranking. Selecting a visually appealing thumbnail can grab viewers' attention as they browse.
💡 Pro Tip: While your video is uploading, you can start drafting your video description and selecting relevant tags. This will save you time and allow you to publish your video more quickly.
Once the upload is complete and you've filled in the necessary details, you can choose your video's visibility settings: Public, Private, or Unlisted. If you're not ready to publish immediately, you can schedule your video to go live at a later date. This is particularly useful for maintaining a consistent posting schedule and aligning your content release with marketing campaigns. Many social media management platforms, like PostLayer, can also help streamline this process, allowing you to schedule your YouTube videos alongside your other social media content. This integrated approach can save you time and effort in the long run.
Step 3: Scheduling Your YouTube Video
Once your video is uploaded and processed on YouTube, scheduling it for optimal viewing is a crucial step. This ensures your content reaches your audience when they're most active and engaged. Fortunately, YouTube provides a straightforward scheduling feature within its platform. Here's a step-by-step guide to effectively schedule your YouTube videos.
Scheduling Steps:
- Navigating to the 'Visibility' Settings: After uploading, you'll find visibility options. Select 'Private', 'Unlisted', or 'Public', but for scheduling, choose 'Public' to reveal the scheduling options.
- Choosing the 'Schedule' Option: Within the visibility settings, you should see a 'Schedule' option. Selecting this will expand further options allowing you to select a specific date and time.
- Selecting the Date and Time: A calendar and time picker will appear. Choose the date and time you want your video to go live. Consider your target audience's location and online behavior when making this selection. Many creators find that posting in the late afternoon or early evening yields better results.
- Setting as Premiere (Optional): YouTube offers the option to set your scheduled video as a "Premiere." This allows viewers to watch the video together in real-time, creating a shared viewing experience with live chat.
- Confirming the Schedule: After selecting your preferred date, time, and premiere options (if any), click the 'Schedule' button. Your video is now scheduled and will be published at the specified time.
💡 Pro Tip: Review your scheduled videos regularly to ensure they are still set to publish correctly. Occasionally, changes to video details or platform updates can affect the scheduling.
By following these steps, you can effectively schedule your YouTube videos, optimizing your content's visibility and maximizing audience engagement. Scheduling videos allows you to maintain a consistent posting schedule, even when you're busy creating new content.
Step 4: Optimizing Your Scheduled Video
Before your scheduled YouTube video goes live, it's crucial to take the time to optimize it for maximum impact. This step involves more than just hitting the "schedule" button; it's about ensuring your video is set up for success in terms of discoverability, engagement, and overall audience experience. This optimization process is vital for ensuring your content reaches the intended audience and achieves your marketing goals.
Key Optimization Steps:
- Double-Checking Details: Review your title, description, tags, and thumbnail. Ensure accuracy and relevance to improve search visibility. Misspellings or inaccurate information can negatively affect performance.
- Adding to Playlists: Organize your content by adding it to relevant playlists. This helps viewers discover related videos and increases watch time.
- Enabling/Disabling Comments: Decide whether to allow comments and manage your comment settings. Consider moderating comments for a positive community environment.
- Setting Category and License: Choose the appropriate category for your video and select the correct license. This impacts discoverability and copyright protection.
💡 Pro Tip: Many creators find it helpful to create a checklist to ensure they don't miss any crucial optimization steps before scheduling their videos. This can streamline the process and improve overall video performance.
By carefully optimizing your scheduled video, you increase its chances of reaching a wider audience, generating engagement, and ultimately achieving your marketing objectives. This proactive approach is a key element of successful YouTube marketing.
Step 5: Managing and Editing Scheduled Videos
Once you've scheduled your YouTube videos, it's crucial to understand how to manage and edit them. Things change: your strategy might evolve, you may spot a typo in your title, or you might need to adjust the publishing time. Fortunately, YouTube provides straightforward ways to access, modify, and even delete scheduled content.
Key Considerations:
- Regularly review your scheduled videos to ensure they align with your current content strategy and marketing goals.
- Be mindful of time zones when scheduling and editing videos, especially if your audience is geographically diverse.
- Check your video's visibility settings (public, private, unlisted) before it goes live to avoid unintended consequences.
Accessing Your Scheduled Videos
To access your scheduled YouTube videos, navigate to YouTube Studio. From the dashboard, typically you'll find a "Content" or "Videos" section. Within that section, there's often a filter or tab to specifically view scheduled videos. This allows you to see all your upcoming uploads in one place.
Editing the Schedule
Editing the schedule is usually a simple process. Select the video you want to modify. You should then be able to adjust the publishing date and time. Many platforms also allow you to change the video's title, description, tags, thumbnail, and other settings at this stage. Remember to save your changes after making any adjustments.
Deleting a Scheduled Video
If you need to remove a scheduled video entirely, the process is usually equally straightforward. From the same area where you edit the schedule, you should find an option to delete the video. Confirm your decision, and the video will be removed from the schedule. Keep in mind that deleting a scheduled video is permanent, so be sure you want to remove it before proceeding.
💡 Pro Tip: If you are managing multiple social media accounts, consider using a platform like PostLayer to schedule and manage YouTube videos alongside your other social media content. This can streamline your workflow and save you time.
Effectively managing your scheduled YouTube videos is essential for maintaining a consistent and engaging presence on the platform. By understanding how to access, edit, and delete scheduled content, you can ensure that your videos are published at the right time and with the right message.
Beyond YouTube's Native Scheduler: Third-Party Tools
While YouTube's native scheduler offers basic functionality, many marketers find themselves needing more robust features for efficient content management. This is where third-party social media management platforms come in. These tools often provide advanced scheduling options, cross-platform posting, and deeper analytics, streamlining your workflow and maximizing your reach.
Benefits of Using Social Media Management Platforms:
- Centralized Scheduling: Manage YouTube and other social media channels from a single dashboard, saving time and effort.
- Advanced Scheduling Options: Schedule posts at optimal times based on audience activity, often with suggested time slots.
- Cross-Platform Promotion: Easily promote your YouTube videos on other platforms simultaneously, increasing visibility.
- Detailed Analytics: Track video performance and audience engagement across platforms with comprehensive analytics dashboards.
- Team Collaboration: Facilitate collaboration with team members on content planning, creation, and scheduling.
💡 Pro Tip: Look for platforms that offer features like bulk scheduling, allowing you to upload and schedule multiple videos at once, saving considerable time.
When choosing a scheduling tool, consider factors such as the number of social accounts you need to manage, the features you require (e.g., bulk scheduling, team collaboration), and your budget. Many platforms offer tiered pricing plans to accommodate different needs. Some platforms, like PostLayer, offer a comprehensive solution for scheduling, content management, and analytics, designed to streamline your entire social media workflow. They often include features like a visual content calendar, AI caption generation, and hashtag suggestions to further enhance your content strategy.
Considerations When Choosing a Scheduling Tool:
- Platform Compatibility: Ensure the tool supports all the social media platforms you use, including YouTube, Instagram, Facebook, etc.
- Pricing Structure: Compare pricing plans and choose one that aligns with your budget and usage needs.
- Ease of Use: Opt for a user-friendly interface that is easy to navigate and learn.
- Analytics and Reporting: Look for robust analytics features to track your video performance and audience engagement.
- Customer Support: Check for responsive and helpful customer support in case you encounter any issues.
By leveraging the power of third-party social media management platforms, marketers can significantly improve their YouTube scheduling efficiency, enhance their content strategy, and ultimately achieve better results.
Conclusion: Mastering YouTube Scheduling for Marketing Success
Scheduling your YouTube content is a powerful strategy for marketers looking to maintain a consistent online presence and maximize audience engagement. By planning your uploads in advance, you can ensure a steady stream of content, even when you're busy with other tasks. This also allows for better content promotion across other platforms, timed to coincide with your video's release.
Key Steps Recap:
- Plan your content calendar: Outline your video topics and schedule release dates in advance.
- Optimize your video for search: Craft compelling titles, descriptions, and tags.
- Use YouTube's scheduling tool: Upload your video and set a specific publish date and time.
- Promote your scheduled content: Share upcoming videos on other social media platforms.
Consistency is crucial for building a loyal audience on YouTube. Regular uploads keep your subscribers engaged and coming back for more. Scheduling helps you maintain this consistency, preventing gaps in your content schedule and allowing you to cater to your audience's viewing habits. Many viewers appreciate knowing when to expect new content from their favorite channels.
💡 Pro Tip: Consider using a social media management platform like PostLayer to manage your YouTube scheduling alongside your other social media channels. This can streamline your workflow and save you valuable time.
The journey doesn't end with scheduling. Analyzing the performance of your videos is essential for refining your content strategy. Pay attention to metrics like views, watch time, audience retention, and engagement. Use this data to understand what resonates with your audience and adjust your future content accordingly. Experiment with different video formats, topics, and posting times to optimize your results.
By mastering YouTube scheduling and consistently analyzing your performance, you can significantly improve your marketing efforts and build a thriving YouTube channel.
Conclusion
Understanding and implementing the strategies outlined in this guide will help you make the most of schedule youtube videos: a step-by-step guide. The key is to start with the fundamentals and gradually build upon your knowledge and skills.
🔑 Key Takeaways
- •Why Schedule YouTube Videos?
- •Step 1: Prepare Your Video for Upload
- •Step 2: Uploading Your Video to YouTube
- •Step 3: Scheduling Your YouTube Video
Quick Answer: Scheduling YouTube videos is essential for efficient content management.
Stop Manually Uploading! Streamline Your YouTube Strategy.
Ready to take your YouTube marketing to the next level? PostLayer simplifies scheduling across all your social channels, including YouTube. Plan your content with our visual calendar, generate engaging captions with AI, and get smart scheduling recommendations. Start your 7-day free trial today – no credit card required!
Start Free Trial

